Parental Control / Protecting my kids from some of the nastier stuff on the web is my motivation. On M$ Windows there are commercial offerings such as NetNanny. On Linux I had briefly tested and used Squid with DansGuardian – likely more accurate with word filtering but a little resource intensive for my daughters old computer – maybe some time in the future.
NetNanny alternative
What is OpenDNS?
Computers (and web servers) identify themselves by IP addresses e.g. 192.168.1.123, like telephone numbers. So when the number is typed in you connect to the computer. As the numbers are difficult to remember we usually type easy-to-remember web addresses instead. Your computer takes this web address and looks up the corresponding IP address number – like using the golden/yellow/white pages. This lookup facility is called DNS. So if I type wikipedia.org it will be converted to the IP address of: 208.80.152.2
Now, the folks at OpenDNS put a twist on this and if the web address is dodgy e.g. dodgysite.com instead of giving you the actual IP address of 66.114.124.140 OpenDNS gives you a dummy IP address of 67.215.65.130 which displays a blocked message rather than a potentially offensive website.
The Problem
I decided to try out OpenDNS as it sounds useful but curse me I am a GNU/Linux user (Ubuntu) with a dynamic IP address i.e. a different IP address is assigned to my computer (or router) by my ISP each time I connect. I could still use OpenDNS on the basic filtering policies but that is not enough for me – I need to be able to customise it for my kids. Windows and Mac users can download a client which talks to OpenDNS and updates their IP address each time it changes but there is no official client for Linux users.
The Solution:
- Register with OpenDNS and add your network (IP address)
- In the settings for this network set the filtering level and enter any websites you want to manually block or definitely allow
- Install the DDClient perl script as follows either using a graphically file manager (e.g. nautilus/dolphin) or on the command line (Applications > Accessories > Terminal) as shown below. (If you want to use the GUI launch your File Manager in super-user (root) mode from the command line enter: sudo nautilus )
- Download the DDClient from here.
- Extract the tar archive i.e.
tar xzf ddclient.*.tar.gz
- Copy the file ‘ddclient’ to /usr/sbin i.e.
sudo cp ddclient /usr/sbin
- Create a configuration file for ddclient to use e.g.
sudo mkdir /etc/ddclient
sudo mkdir /var/cache/ddclient
sudo gedit /etc/ddclient/ddclient.confPaste the following into the file, change your OpenDNS login details and network label (highlighted in green) – available after you register with OpenDNS – then save the file:
daemon=900
syslog=yes
mail=root
mail-failure=root
pid=/var/run/ddclient.pid
ssl=yes
##
## OpenDNS.com account-configuration
##
use=web, web=myip.dnsomatic.com
server=updates.opendns.com
protocol=dyndns2
login=opendns_username
password=opendns_password
opendns_network_label - Copy sample-etc_rc.d_init.d_ddclient.ubuntu to /etc/init.d/ddclient
sudo cp ./sample-etc_rc.d_init.d_ddclient.ubuntu /etc/init.d/ddclient
- Add a auto start link link:
sudo cd /etc/rc2.d
sudo ln -s ../init.d/ddclient ./S99ddclient - Start the ddclient service on your computer:
sudo /etc/init.d/ddclient start
- To get each computer to use OpenDNS for resolving web addresses (and denying the dodgy ones) we need to get the computers to use the OpenDNS servers for looking up domain names. This can be done in either of the following methods:
-
- By adding the OpenDNS server addresses (see below) in System > Preferences > Network Connection. However, if you use DHCP to acquire your network settings the option will be greyed out, so option 2 or preferably option 3
- sudo gedit /etc/resolv.conf and replace the existing DNS server addresses with the OpenDNS addresses (or just add the OpenDNS ones above your existing ones) i.e.
nameserver 208.67.222.222
nameserver 208.67.220.220 - Log in to your router and add the OpenDNS addresses there. For me using a Linksys WAG54G2 I can add them under the ‘Setup’ tab and the section entitled ‘Network Setup (LAN)’ there are spaces for 3 Static DNS addresses. Enter the OpenDNS addresses in the first two and as a fallback option you could add your ISPs DNS server in the third space. You can get them from the ISP website or from the command line: cat /etc/resolv.conf
- Test it!
- Debug it with:
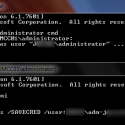
/usr/sbin/ddclient -daemon=0 -noquiet -debug
The OpenDNS DNS server addresses are:
208.67.222.222
208.67.220.220